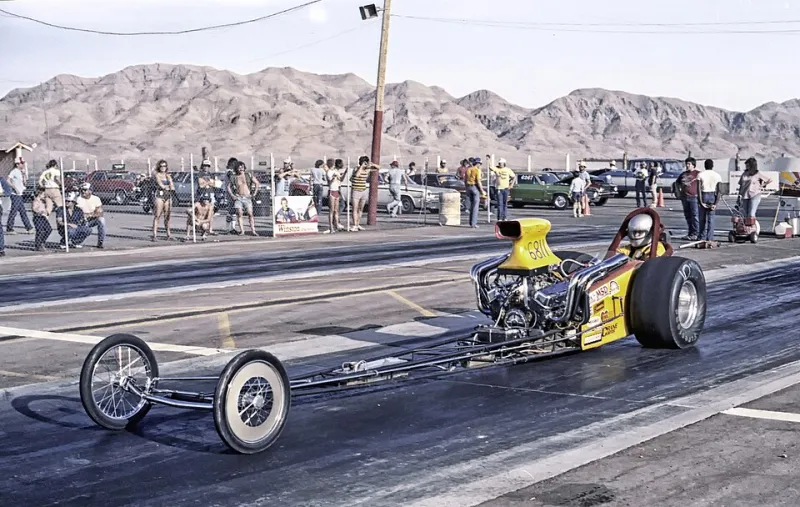
Dyno Lies and Strip Surprises: Matching Your Front-Engine Dragster's Power Curve to Your Launch

Photo by Photo by Adrián Valverde on Unsplash on Unsplash
There's a particular kind of frustration that comes from staring at a dyno printout that shows everything you want — peak horsepower, a fat torque curve, numbers that should put you in the winner's circle — and then watching your front-engine dragster stumble, spin, or just plain underperform on the actual strip. Sound familiar? You're not alone, and the problem almost certainly lives in the gap between where your engine makes power and when your chassis actually needs it.
This isn't a knock on dyno tuning. It's a critical tool. But a chassis dyno or engine dyno session measures power delivery in a controlled, static environment. The drag strip is anything but controlled. Traction, atmospheric conditions, driver input, and chassis behavior all collide in the span of a few seconds, and if your fuel mapping and ignition timing aren't set up to match that reality, you're leaving time on the table — or worse, burning it up in tire smoke.
The Disconnect Between Peak Numbers and Real-World Performance
Here's the core issue: most engine builders and tuners optimize for peak power numbers because that's what sells engines and wins bragging rights on paper. But a front-engine dragster doesn't need maximum horsepower at the exact moment the light goes green. What it needs is usable power — torque that loads the tires correctly, builds chassis squat at the right rate, and carries through the mid-track without a stumble or a spike that breaks traction at 330 feet.
A steep, aggressive power curve that climbs fast and hits hard might look incredible on a graph, but on a prepped track with a sticky tire, it can actually work against you. The rear tires get overwhelmed before the chassis has time to transfer weight properly, and suddenly your beautifully tuned engine is just spinning rubber. Meanwhile, the guy running a slightly softer, more progressive curve walks away with the win light.
The inverse is also true. A lazy, flat power curve that builds too gradually can leave you getting walked off the line while your competitor's car is already hooked and hauling.
Reading Your Data Before You Touch the Tune
Before you start adjusting fuel maps or pulling timing, you need to actually understand what your car is doing. If you're not running a data logger of some kind, this is the moment to fix that. Even a basic system that captures RPM, throttle position, and driveshaft speed will tell you a story that your eyes can't catch at 200-plus miles per hour.
Look specifically at three zones:
The Launch Window (0–60 feet): This is where fuel delivery and initial ignition timing matter most. If you're seeing RPM spike immediately after launch, your fuel curve is likely too aggressive in the lower RPM range, or your timing is advancing too fast. A slight stumble or hesitation here usually points to a lean condition right off idle under load — a situation where the engine is outrunning its fuel supply in the first fraction of a second.
The Mid-Track Transition (330–660 feet): This is the sneaky zone where a lot of front-engine dragster racers lose time without realizing it. Power curves that peak early and then taper off will cause the car to feel like it's "running out of steam" through the middle of the track. Watch your driveshaft speed data here — if it's plateauing when it should be climbing, your power delivery is falling off and your tune needs to extend the curve.
The Top-End Pull (660–1000 feet): By now, most of the traction battle is won or lost. But if your timing is still conservative from a launch-oriented tune, you may be giving up significant power through the back half. Some racers run a two-stage ignition advance specifically to address this — holding timing back at launch for traction, then advancing it aggressively once the car is hooked and moving.
Fuel Mapping Strategies That Actually Match Strip Conditions
One of the most common mistakes is treating the fuel map as a set-it-and-forget-it piece of the puzzle. Track conditions change — temperature, humidity, track prep, even the time of day — and your fuel delivery needs to be flexible enough to account for that.
For front-engine dragsters running carbureted setups, this often means having more than one jet configuration ready to go. A jet change might seem old-school, but it's still one of the fastest ways to adjust fuel delivery for ambient conditions at the track. Know your baseline and know how much you're willing to move in either direction before the car starts to suffer.
For EFI-equipped builds, you've got more granular control, but that also means more rope to hang yourself with. Work with a tuner who has actual track experience with front-engine cars — not just road course or street performance background. The load characteristics are completely different, and a map that works beautifully on a chassis dyno can still be wrong for the strip.
One practical strategy worth considering: build your fuel map with a slightly richer condition through the lower RPM launch range to protect against lean stumbles, then let the map lean out progressively as RPM climbs and the engine is fully loaded and pulling hard. This approach trades a tiny bit of peak efficiency for launch consistency, which is almost always the better trade in bracket and heads-up racing alike.
Ignition Timing: The Lever Most Racers Ignore
Fuel gets most of the attention, but ignition timing is equally important in shaping how your power curve behaves at the strip. Running too much initial timing can cause detonation under the heavy load of a launch, which not only hurts power but can damage engine components over time. Running too little initial timing leaves power on the table and can actually cause heat buildup.
The goal is a timing curve that builds smoothly and reaches its full advance by the time the engine is in its primary power band — not before. If you're running a mechanical advance distributor, check your advance springs and weights. It's a small thing that gets overlooked, but worn springs that let the advance come in too fast can completely change how the car behaves off the line.
For racers using programmable ignition systems, consider mapping a slightly retarded initial advance with a fast-climbing curve that hits full advance by 3,500–4,000 RPM. This gives the tires a slightly softer hit at launch while still delivering full power through the meat of the run.
Putting It Together at the Track
Here's the honest reality: there's no perfect tune that works everywhere, every time. What there is, is a methodical approach — log your data, make one change at a time, and test back-to-back in similar conditions. Resist the urge to change three things at once when the car isn't running right. You'll never know what actually fixed it.
The front-engine dragster community has always been built on guys who understand their cars deeply, not just guys who throw money at problems. Getting your power curve and launch strategy to actually match each other is exactly that kind of deep knowledge. It takes time, patience, and more than a few passes to sort out — but when it clicks, the consistency you find is worth every minute of it.